The Steps Manager is a tool to view and organise all the steps in your Cadasio project and is opened by clicking the active step name at the top of the screen. Once you have it open, if you want to close it again, simply press the escape key, or click the cross in the top right-hand corner.
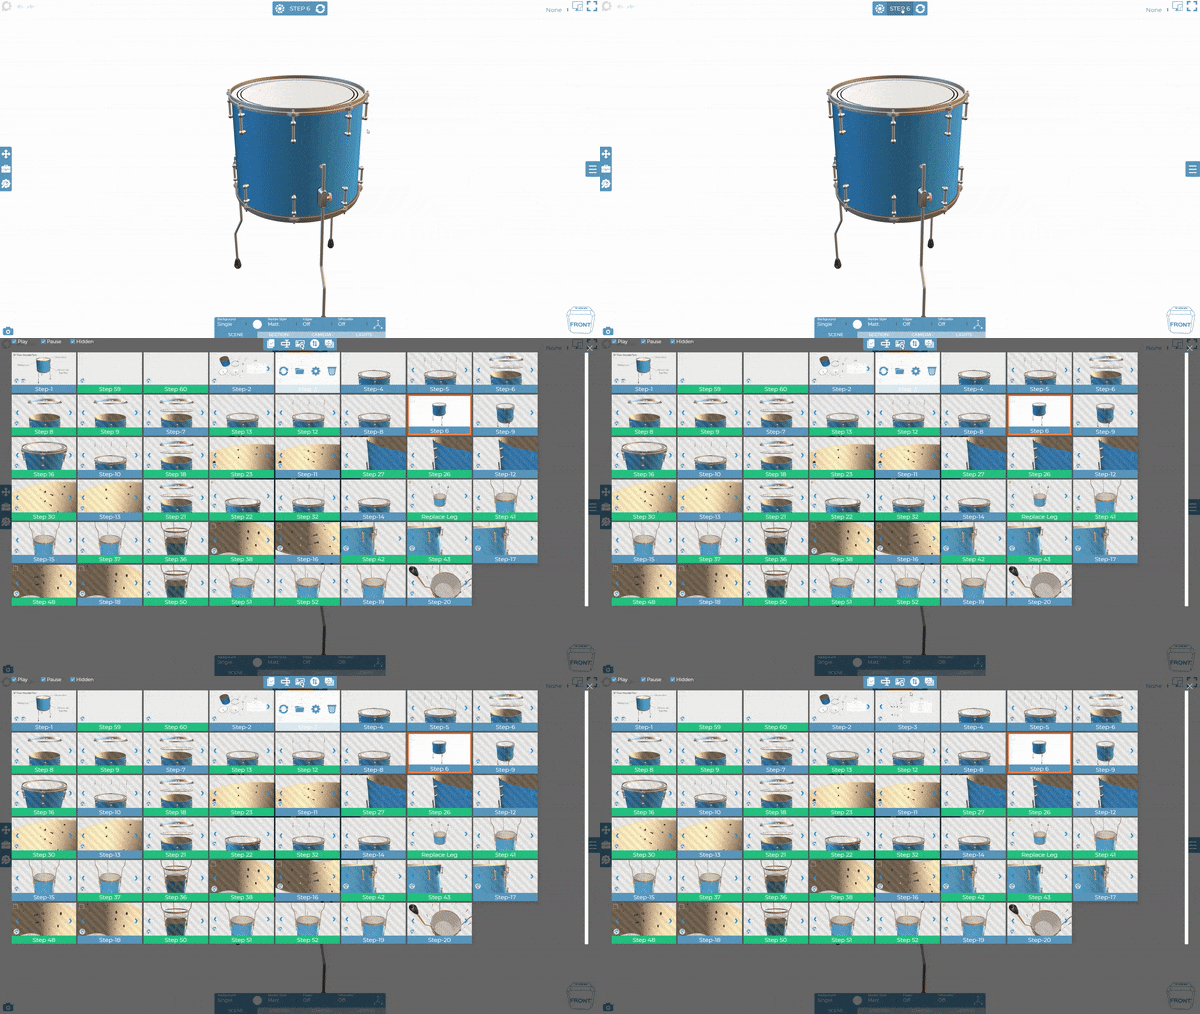
The current active step is identified with a thick orange border. By default you will see all the steps in your project, however you can use the filters in the top left to hide steps based on their behaviour (play, hidden, pause).
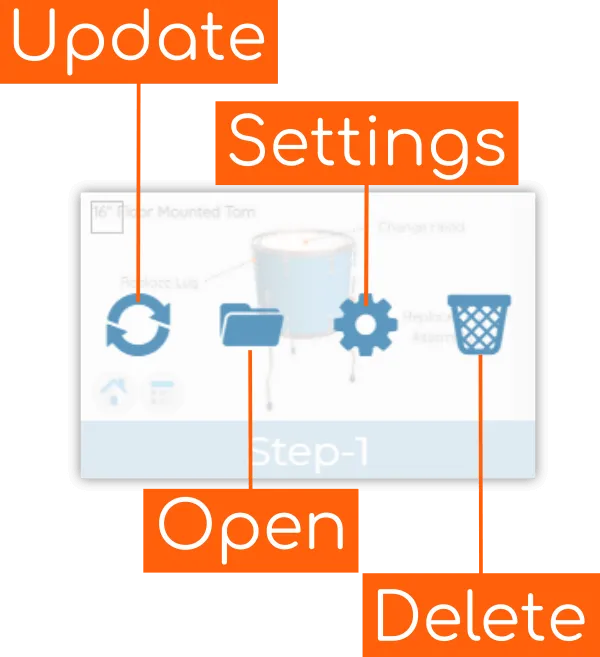
Hovering over a step will display several icons, allowing you to open, update, change settings and delete a particular step.
Selecting steps, by clicking the tick box in the corner of a step, allows you to perform certain operations on multiple steps at the same time. It’s certainly worth knowing about the update step with the current camera and the update with the current selected object tools, as these can both save you a lot of time.
Since you will be rotating, panning and zooming when creating your steps, you may get in the situation where as you progress from one step to the next, the camera view changes. Sometimes this is desirable, giving you a stylish appearance, other times you may prefer to keep a consistent camera between steps. One way of achieving this is by creating a custom camera view, then activating the steps you wish to change, applying the camera then updating. However, this could get tedious if you have a lot of steps to do.

Instead, if you have the camera in the desired position and orientation that you want, simply open the Steps Manager, select the steps you want to apply that camera view to and then click the "Update With Current Camera" tool. You will see the chosen steps get activated and updated automatically, saving you a lot of time, and ensuring a consistent look across your steps.
Updating steps with a particular object works in a similar fashion. Simply select the object whose current properties you want to duplicate, open the Steps Manager, select the steps you want to apply it too and then click "Update With Selected Objects". You will see the chosen steps activated and updated to reflect the selected objects properties. This can be useful when you want to put an image on several steps.
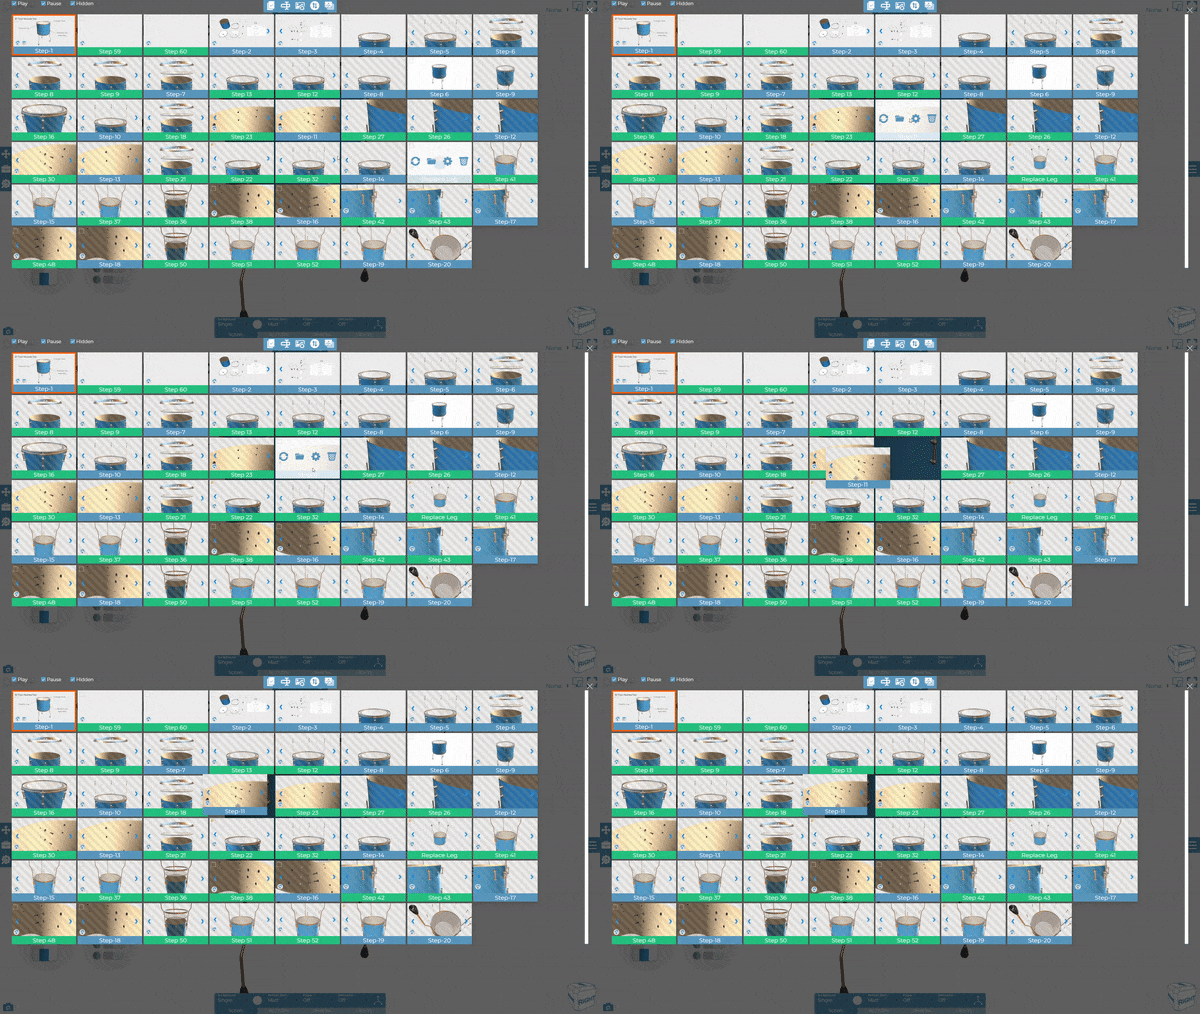
Another useful tool in the Steps Manager is the ability to reorder the steps. This can be done on an individual basis by simply dragging and dropping a step in to a new location. We can also reverse all the steps in one go. This is particularly useful when creating an assembly procedure, as a lot of the time you may actually construct your Cadasio project in reverse, disassembling it initially. Rather than manually moving all the around at the end, simply reversing them can turn a disassembly procedure into an assembly procedure in a single click.
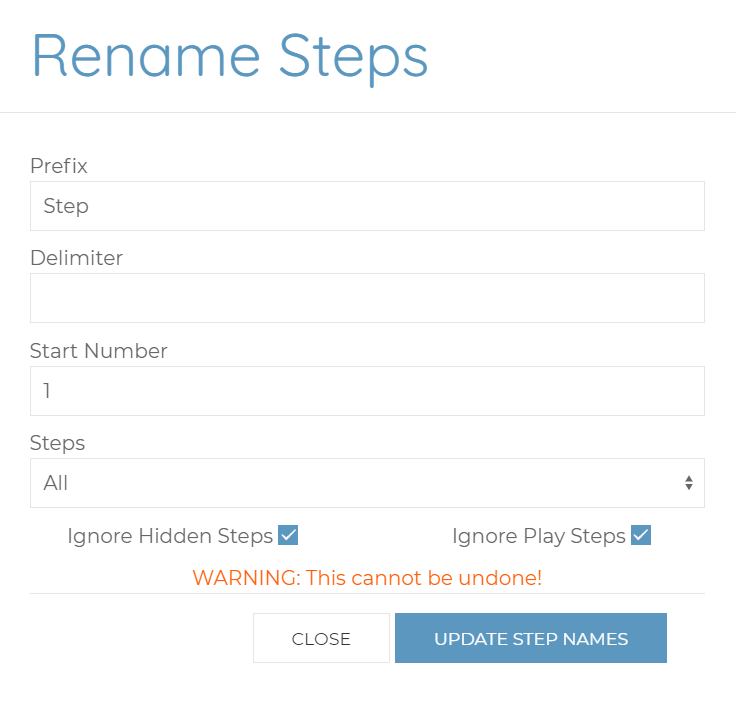
By default, when you create a step it just calls it “Step” and then a rolling number which increases as you create steps. Certain functions such as a manual reorder, deleting a step or a reverse can result in the step numbers being out of order. Of course, you can manually rename any step you wish, but if you just want a simple naming convention you can use the rename tool rename all the steps for you. With the tool you can set a prefix, delimiter, start number, which steps are affected and whether hidden and play steps are included.
When you create a step an image is taken of how it looks at that moment in time, that’s what you are seeing in the thumbnails in the Steps Manager. Operations like an update and propagate, these images may become out of date, and the Steps Manager will show you this by hatching any steps where the image associated with it may not reflect the true step.
By default, when you activate one of these steps Cadasio will automatically update the image. You may have changed this behaviour by stopping the automatic update of out-of-date steps, which can be done in the project’s options, or you may have a lot that need doing and you don’t want to have activate each one in turn. You can use the update thumbnails tool in the Steps Manager to help you out. You can choose whether to just update the images of those cadasio knows are out of date, the selected steps, or all of them - which can be useful if you have updated the projects CAD model via one of the Cadasio addins.
The final tool you will want to know about on the Steps Manager is the "Publish Image" tool. This is the same as the one found on the left-hand side of the Cadasio designer but allows you to preselect the steps whose image you want to download.

.jpg)


